

Adobe Illustrator is the go-to standard for vector graphic illustrations. I’ve used it for years…until this year, when I finally cancelled my subscription (and saved myself over $20 a month). I needed a cost effective alternative, so I turned to Affinity Designer. It’s great, and I with it can do pretty much everything I needed to do when I was using Illustrator, except for one thing.
Image Trace. That magical, one-click, make your life so much easier feature that turned raster art into scalable vector graphics. I hate manual tracing, so Image Trace was a godsend for me. Canceling my sub meant I was giving that up but I was determined to find a solution.
A combo of Procreate + Affinity Designer (or a solo AD since it has a pixel feature) meant manually tracing each line art graphic. I added in Adobe Capture to the mix, and found results but too many steps and didn’t give me enough control over the results of the tracing.
Then came Inkscape. Inkscape is a free, open-source vector program that’s been around for years. It’s been at least 10 years since I used it, convinced Illustrator was the be-all, end-all of graphics programs and as a respectable designer, I absolutely needed it (file under “Lies I Told Myself”). During my search for an Image Trace alternative, I came across a forum discussing Inkscape’s Trace Bitmap ability and immediately tested it with great results.
So if you’re ready to ditch Illustrator but still hanging on to it for that Image Trace magic, keep reading for a different method.
What You’ll Need
- Just Inkscape or Inkscape and Affinity Designer, and a computer or tablet.
- Some line art you want to vectorize. Hopefully you drew your own! You can do this in Procreate App or Photoshop or whatever program you choose.
There are versions of Affinity Designer for both desktop and iPad, but they have to be purchased separately, so for the sake of following this guide, I would recommend the desktop version if you choose to get it.
It’s not completely necessary to have Affinity Designer to turn raster line art into vector line art, though.
While you could exclusively use Inkscape, Affinity Designer has a lot of great features, and I personally prefer using that for fine tuning vector work after tracing it in Inkscape. Until ADesigner adds its own image trace function, this is my system.
Draw Your Art
You can use something you’ve made in Procreate or Photoshop, but for the sake of this tutorial, I’m using some line art I created in Procreate.
Import into Inkscape
Open Inkscape and go to FILE > IMPORT and find your .PNG. It will give you some options in a menu. Click OK.
Then, resize your page to fit your file. Just go EDIT > Resize Page to Fit Selection.
ALTERNATIVELY you can open your line art file into Photoshop or whatever program you choose, use the lasso tool and select an element, CTRL + C to copy it (make sure you’re on the right layer) and CTRL + V to paste into an Inkscape document. You don’t necessarily have to import files! This also eliminates the need to save each element to its own file. You also don’t necessarily have to resize the Inkscape page, either. The vectorizing process works the same, regardless.
Now comes the fun part…
Open a new document in Inkscape.

Select your settings and click OK.
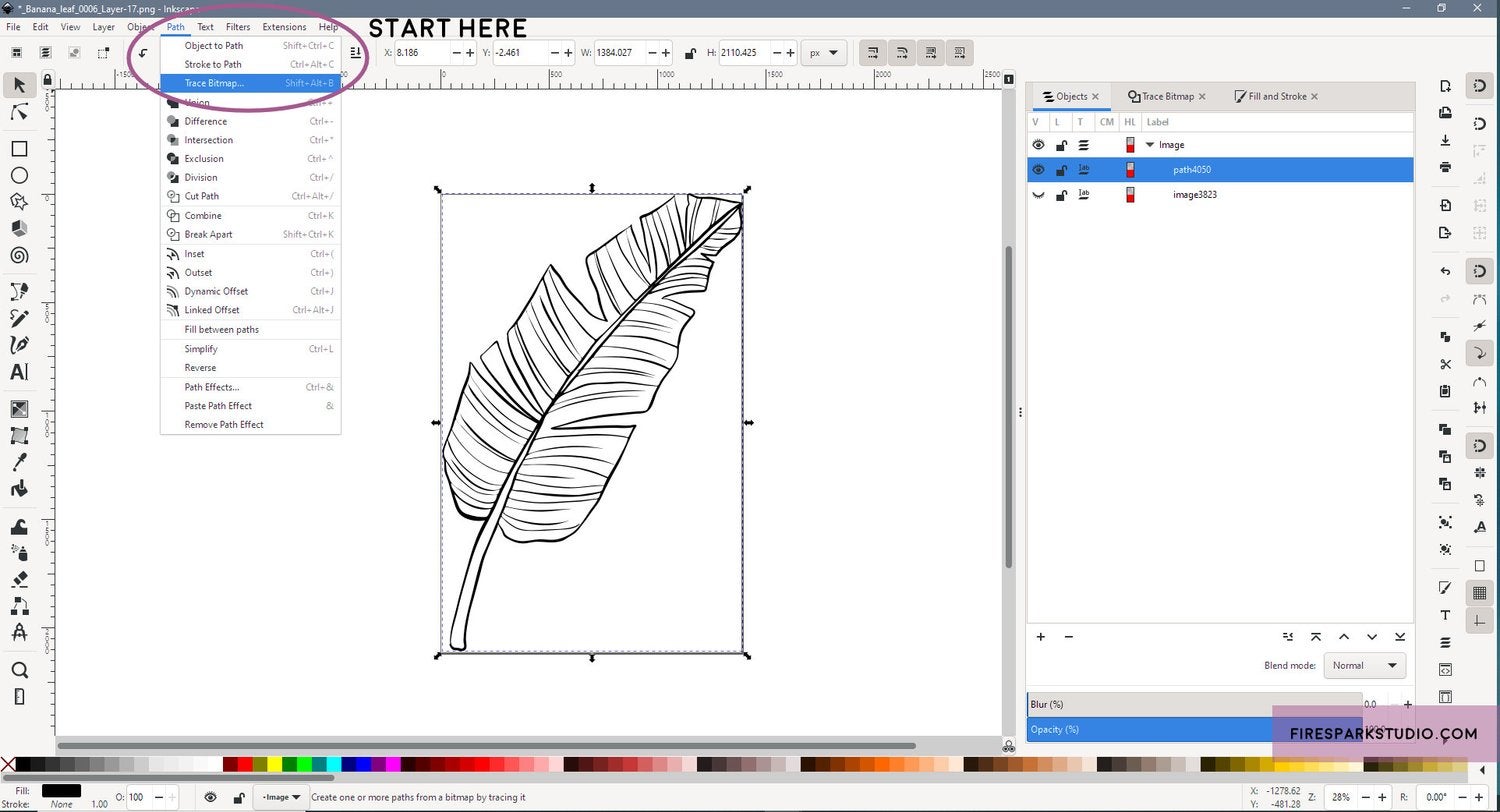
Path > Trace Bitmap
In Inkscape, select your image and find the PATH menu. Under Path, select TRACE BITMAP. A pop up menu will open with some settings you can change if you like.
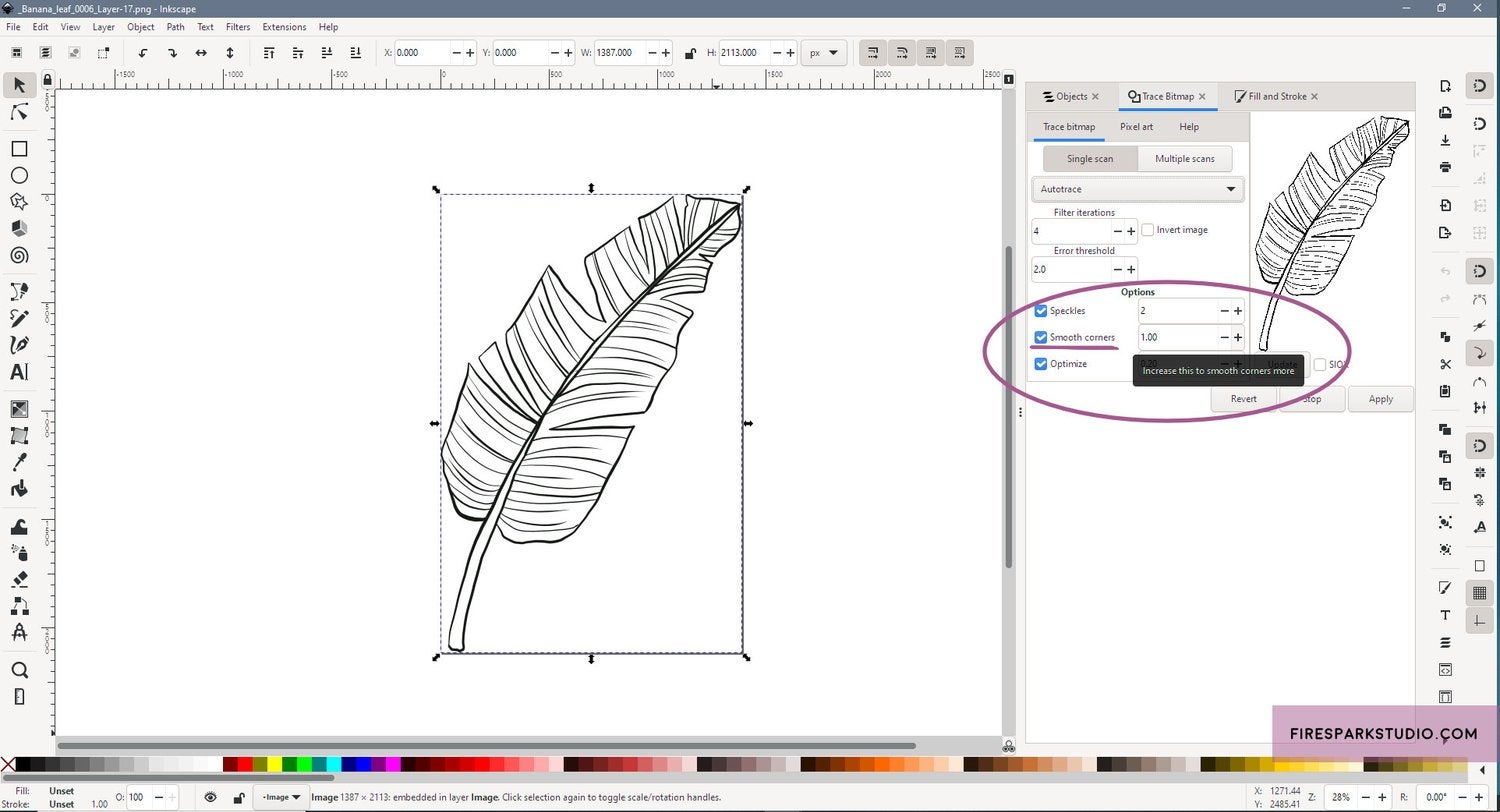
I didn’t alter the settings much here. You can select “Remove Background” if your image has one, but if you’re using a transparent .PNG as your image, you shouldn’t need to. Click OK and close that pop up menu.

There are options for single and multiple scans. Select the one that will work best for your project.
Play around with your settings and experiment a little. I found using the Single Scan Edge Detection setting helped preserve more texture in rougher style line art drawings.
- Brightness Cutoff - traces a given brightness level, boost this to cover more if you’re tracing an image with a broad value range
- Edge Detection - pretty much an auto trace function, higher threshold value for more details
- Color Quantization - traces around reduced color values, lower value means less area traced, higher value means more area traced
- Autotrace - does what it sounds like. This seems to be the function that most closely mimics Illustrator’s trace.
- Centerline Tracing - this creates a single line in the very center of your graphic instead of tracing the entire graphic. I’m unsure about when this would be useful, so I personally would not use this.
Below are some notes on additional options you have.


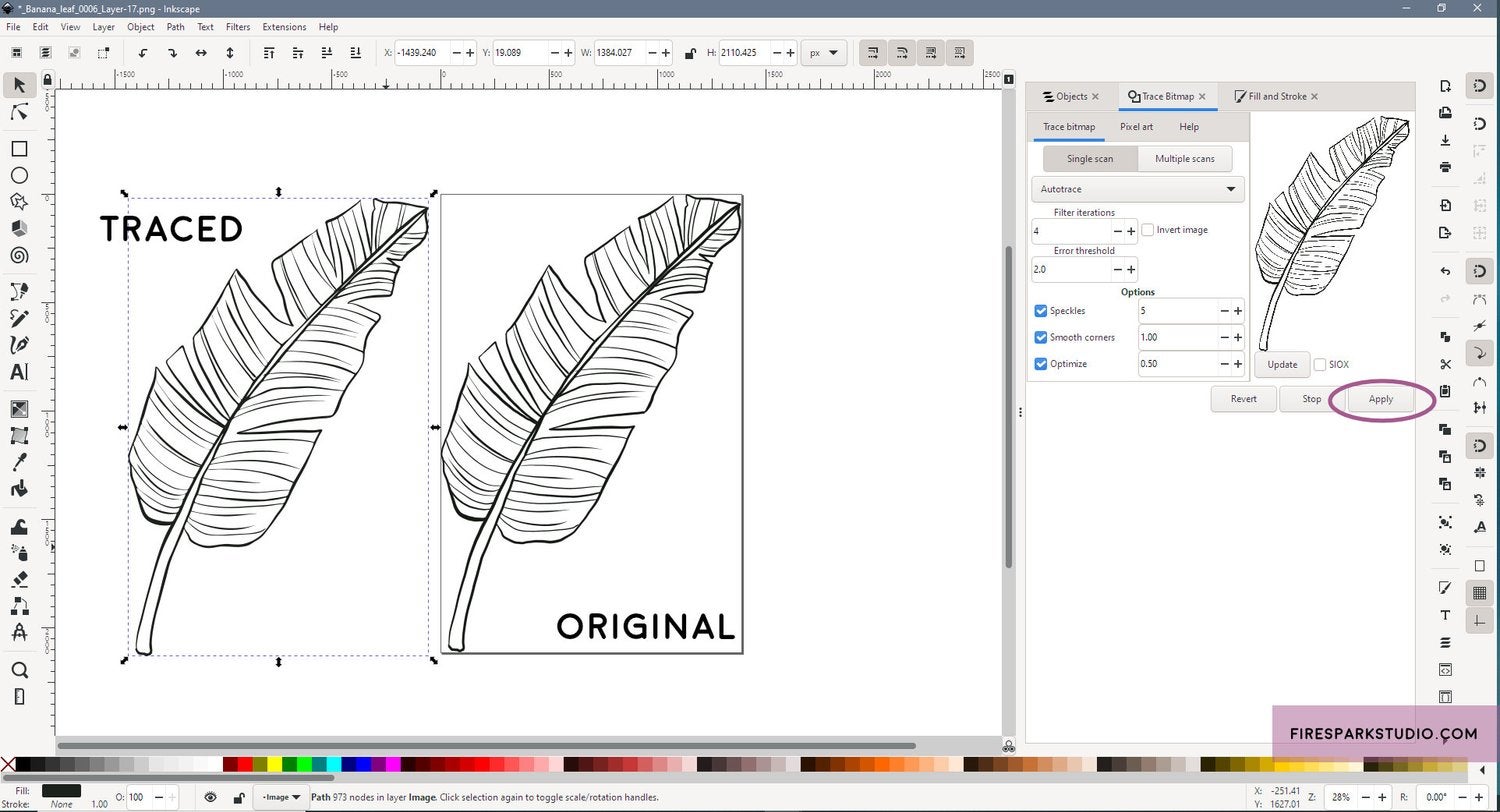
Your traced vector image should be visible. But you’re not done yet.
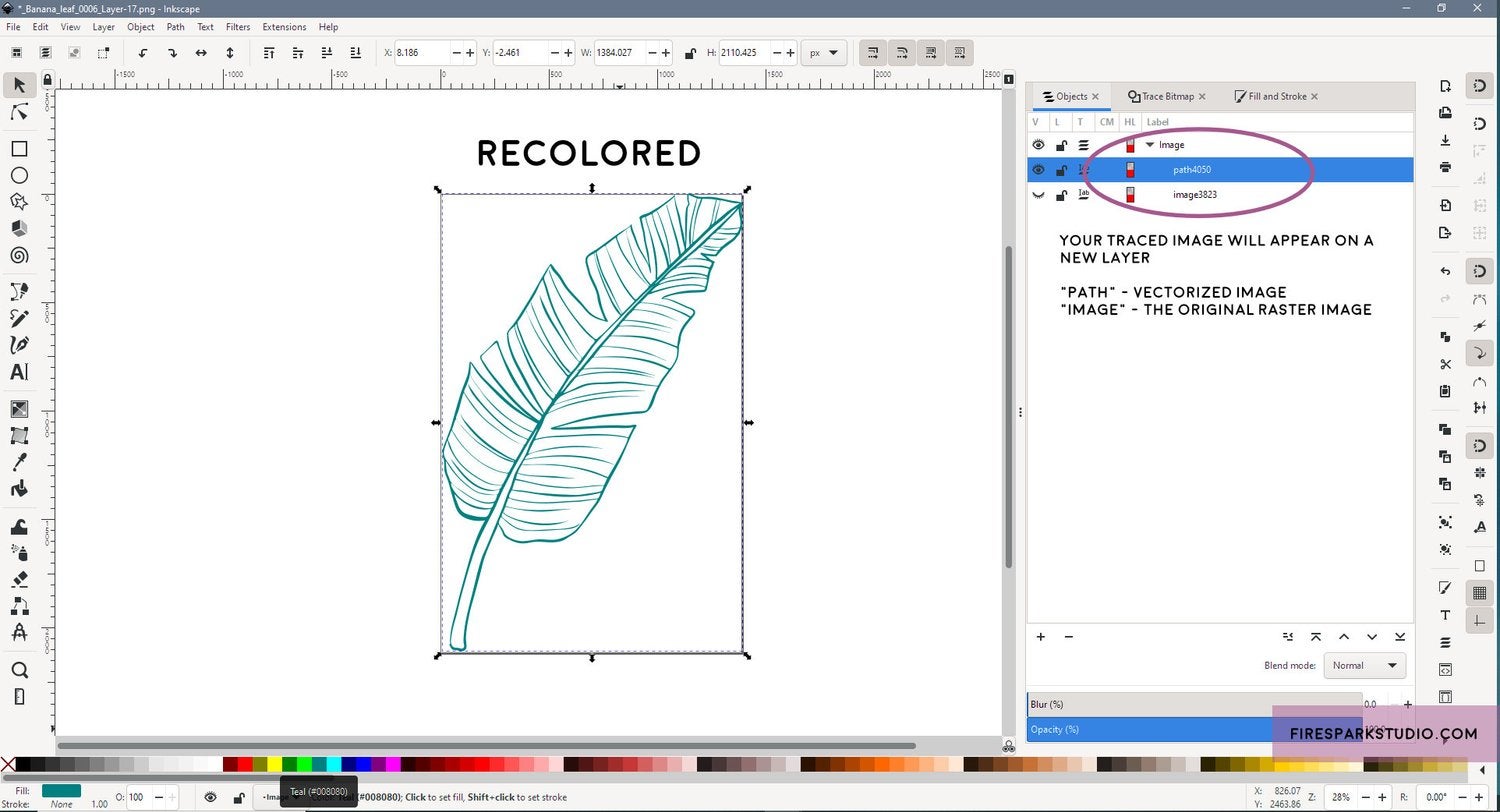
Click on the vector image, and drag it off to the side. Underneath it will be the original raster image you traced. Click and delete it, and move your vector image back onto the page.
If your vector contains solid black, now is the time to shift the fill color before saving. Other than post editing the vector color profile in Affinity Designer, I did not find another way to prevent Inkscape from saving a vector that was solid black in Grayscale. Avoiding solid black eliminated another step so it’s worth doing before you save.
To save your vector, go to File > Save As… and select your extension. Inkscape works with .SVG by default but there is an option to save as .EPS, so that is what I used.
Congratulations! You’ve vectorized your raster drawing without it costing you $20.99 a month to do so.
Multiple vectors?
I like to group multiple vector illustrations into one document for simplicity’s sake. But since we’re working with single images, we’ll have to group them ourselves in a document. Luckily, Inkscape makes that possible as well.
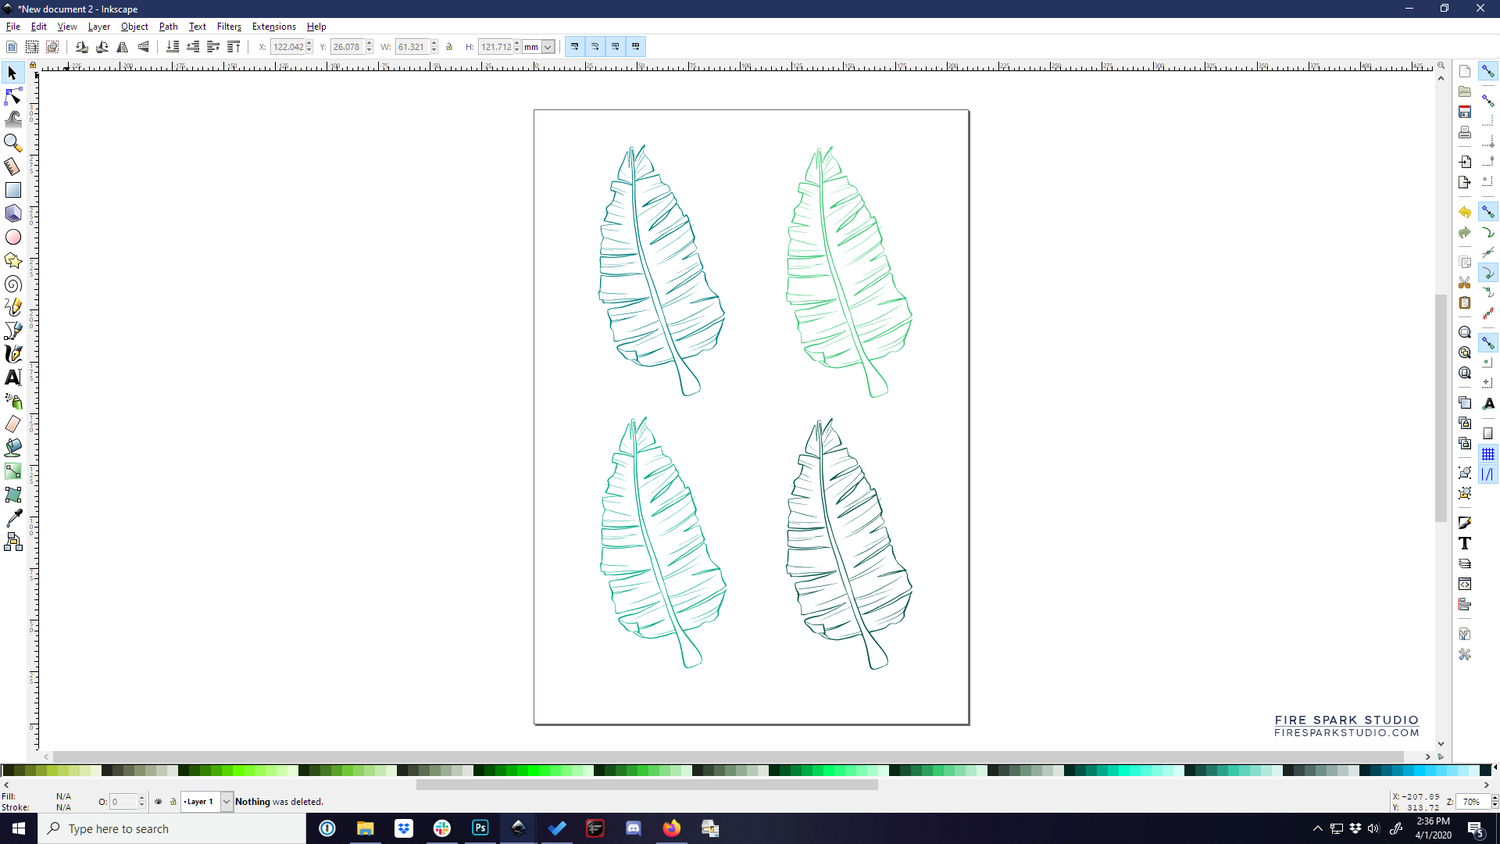
Start up a blank document and as you vectorize each raster image, copy and paste it into your “master vector document”. When you save your work, save the master document containing whatever images you like instead of saving them individually.
Start up a blank document and as you vectorize each raster image, copy and paste it into your “master vector document”. When you save your work, save the master document containing whatever images you like instead of saving them individually.
Multiple Layers?
Additionally, if you want to use layers to organize your design, you can do that as well. For example, if you need to vectorize a graphic that has three separate layers containing different parts of the design, put each part in it’s own layer, and vectorize them one at a time. At this time, Inkscape doesn’t seem to have a way to vectorize layer groups, only the items within each group individually.
I hope you found this Image Trace workaround helpful! Personally, once I figured out the workflow, I didn’t find it much more involved than Illustrator’s Image Trace feature was. Let me know what you think about this method, and whether you believe it can be further improved upon!
Good luck, and happy creating!
Last updated October 2022 with new techniques I found while using this method. Graphics have also been updated. You will need the latest version of Inkscape to make use of them.Unnecessary steps have been removed from the guide.
Comments ()